Showing posts with label Recipes. Show all posts

Friday, June 2, 2023

Meal Planning 101

Grilled pork chops are a
quick and easy meal.
Being prepared takes time and the more time you put up front the better the week will be. This means that you have to put in some planning time before the week begins to plan out your week.  Grab your calendar, let's do this!

Looking at my calendar I add anything I don't already have on it.  Then I look over each day and see where I will be and what I will be doing.  This helps with the next step.  I look to see if there are days I am going to be out for dinner or lunch.  Then I look to see if my last appointment buts up to a meal where I won't have time to cook or make it. I don't have a job where I am in an office.  If I did, then lunches would be easy.  When I did have a job in an office, I packed my lunch every day.  I usually packed leftovers from last night's dinner.  I planned dinners where I would have leftovers for my lunches. If I didn't have leftovers then I packed a frozen meal or a sandwich. 

Now, let's talk dinners.  On my calendar where an appointment buts up to dinner time, I try to plan a meal that cooks all day in the crock pot with minimal additional prep.  I plan those first. Next I look at what I have in our freezers or what needs to be eaten soon.  I make sure those items are on the menu somewhere. We are a "meat and potatoes" family so I plan the meat first then add in the sides.  This whole process so far takes me about 5 minutes.  If I know we are tight on money then I make sure I shop my pantry (this is where a well-stocked pantry comes in handy). 

One of our favorite dinners is
crockpot spaghetti sauce. 
See below for the recipe.
Once I have a menu planned.  I start my grocery list. 

Truly it is that easy.  That little bit of time will save you from my life right now.  It is 5:43 and I didn't plan dinner.  I have no meat thawed and have nothing that can be quickly cooked.  We tend to be an "ingredients" house.  We don't do prepared foods because 1. it isn't good for you and 2. it isn't that good. So whatever we eat we have to make, like actually make. Tonight might become "Pizza Friday" and that is okay.  Tomorrow I will meal plan for next week and grocery shop.  

A big part of being prepared is forgiving yourself when you have dropped the ball.  I see my mistakes and I see the results when I don't menu plan. When I fail I forgive myself and jump back on that wagon. So tomorrow I menu plan.


Quick Crock Pot Spaghetti Sauce

Ingredients:

1 lb ground beef or (our favorite) ground Sweet Italian pork sausage

2 16 oz. jars your favorite spaghetti sauce.

Brown the meat in a saute pan. Drain any fat. 

Mix the two jars of spaghetti sauce and the browned meat in a crock pot.  Turn on low and let cook 4 to 6 hours stirring occasionally.  

Serve over pasta noodles with warm, crusty bread and a salad. 


Why put this in a crock pot and cook all day when you can quickly mix, heat and serve immediately?  Because the flavors meld together and take a mediocre jarred spaghetti sauce to the next level.  It tastes homemade and amazing!!  Give it a try!!

Tuesday, February 24, 2015

Herb Stuffing/Dressing

This is one of my dad's recipes.  He was famous for his "secret ingredient".  It was always something that put the recipe over the edge.  It would be good without it but GREAT with it. This recipe also has a  "secret ingredient".

1 lb pork sausage
2 cups chopped celery
2 cups sliced mushrooms
1 1/2 cups chopped onion
1 can chicken stock
2 (8 oz) packages of herb seasoned stuffing mix
1 (8 oz) can of water chestnuts, drained
2 teaspoons poultry seasoning

1; Brown sausage, stirring to crumble, drain.
2: Add celery, mushrooms, and onion.  Cook over low heat until tender.
3: Add chicken stock -combine rest of ingredients - spoon into baking dish.
4: Cover and bake at 350 degrees for 45 min.

Yield - 9 cups.


So what is the secret ingredient???  Can you find it?  Dad was nice enough to always include it in his recipes that he wrote down.  Thank goodness or we would never have been able to replicate his recipes.

This recipe starts out innocent enough until you get to the water chestnuts.  That is the secret ingredient.  It is a great item in stuffing because it gives you a little crunch.  Not a hard crunch like a nut, but an easy crunch.  The water chestnuts hold up to cooking and don't get soggy in the moistness of the stuffing.  It is there but you really can't quite place what it is.  That is what makes it the secret ingredient. See?

You can leave the water chestnuts out and the stuffing will be fine, but with them it is GREAT!

Thursday, February 19, 2015

Better Homes and Gardens Red Checkered Cookbook

I was flipping through my Better Homes And Gardens New Cook Book today, you know, the red checkered one that all our parents had.  I have one too.  I was so excited to get it when I did.  It was expensive but I bought it anyway.  I knew I needed it.

That was back in 1992.  It was copyright dated 1989.  Back then I could just imagine me cooking or baking all the recipes.  Back then the pages were crisp and new. It wasn't like my dad's copy which was slightly yellowed on the pages and had recipe clippings all stuffed in the front and back of the book.  There were pages that had a paper clip on it and some that were dog-eared. I thought to myself. I will keep this nice and new looking.  I will make sure I didn't spill anything on it.  I will not stuff clippings in it.  It was a prize possession.

When we moved last year I packed it up in a box, just stuck the whole thing in the box.  I knew we would be living in the trailer and I just couldn't take a cookbook with me when I had my computer to use if I needed a recipe.  I didn't really miss it.  I looked up recipes on the computer when I wanted something.  It was no big deal.

While we were unpacking in our house now, I found the box with my cookbook.  It was like finding an old friend again.  I took it out of the box, stuffed to the gills with recipe clippings (the cookbook that is) and placed it in a place of honor on the counter.  I can't tell you how many times I have used that book since I unpacked it. I have to be careful when opening it because there are slips of paper stuffed in the front and back and the pages are a bit dog-eared and some of the pages have crusty stuff on it from me turning the page with yucky hands while cooking.

***

Today I was flipping through my copy of this old friend looking for a recipe for pork and while reading it I found that it called for "fines herbs".  I don't know what that is.  So I had to go to my computer and look it up.  (If my dad was still alive I would have called him.)

 Fines herbes is a combination of herbs that forms a mainstay of French cuisine. The ingredients of fines herbes are fresh parsley, chives, tarragon and chervil.

Chervil is a parsley that has a bit of anise taste to it.  

This got me thinking, how old is this book?  It was copyrighted in 1989 and it was the 10th publishing of this fine cookbook.  As I read the introduction it said that the editors struggled with keeping the classic recipes we grew up with like pot roast and chicken and dumplings but added many new tastes like taco salad.  Ha ha ha.... those were new tastes and new dishes in 1989.  Now 25 years later, I think it might be time to update my copy......

Friday, November 28, 2014

Turkey-Zucchini Soup

Here's one for the turkey leftovers!


Turkey-Zucchini Soup

1 pkg (8oz) frozen cut green beans
2 cups thin sliced zucchini
2 cups chopped cooked turkey
1 can (8 oz) tomato sauce
½ cup fine chopped onion
2 cups chicken stock
2 cups water
1 tsp Worcestershire sauce
¾ tsp salt
½ tsp dried savory
Dash pepper
1 pkg (3 oz) cream cheese

1. Place first 11 ingredients in crockpot.
2. Cook on high setting for 3 hours.
3. Blend approx. 1 cup hot soup mix with cream cheese. Return to cooker.
4. Heat through.
8 Servings

Tuesday, September 2, 2014

Seafood, Potato and Corn Chowder

This is another of Dad's recipes.  I loved this chowder. It is a great recipe for cool fall evenings.  I substitute crab meat for the white fish.


Seafood, Potato, and Corn Chowder

3 - 16 oz cans of chicken broth
1 onion chopped
2 large potatoes 1/2" dice
1 can whole corn, drained
1/4 cup flour
2 TBS dill
1/2 cup heavy cream
1/2 lb white fish, 1/2" dice (Can substitute crab meat)
1/2 lb cooked shrimp
1/4 tsp pepper
dash garlic
2/3 cup instant mashed potatoes
Salt to taste

1. In a 3 1/2 QT slow cooker, combine first 5 ingredients and 5 tsp of dill.
2. Cover and cook on low heat about 5 1/2-6 hours.
3. Increase the setting to high. Stir in rest of dill, cream, seafood, pepper, salt and potato buds.
4. Cook 35-45 min longer until slightly thickened.
5. Season with salt.

Serves 4-6.

Saturday, August 23, 2014

Potato Casserole

This is one of my dad's recipes.  He passed away in 2007.  He was a great cook and I am so glad that I was able to get his recipes.


Potato Casserole

3 lbs potatoes, peeled and quartered
1/2 cup butter
2- 3 oz pkgs cream cheese softened
1 cup shredded cheddar cheese, divided
1 - 2 oz jar diced pimento, drained
1 small green pepper, finely chopped
1 bunch green onions, finely chopped
1/2 cup grated Parmesan cheese
1/4 cup milk
1 tsp salt

1. Cook potatoes in boiling water 15 minutes. Drain and mash.
2. Add butter and cream cheese. Beat at medium speed till smooth.
3. Stir 1/2 cup cheddar and next 6 ingredients. Spoon into a lightly greased 11 x 7 x 1 1/2 baking dish. Cover and chill.
4. Remove casserole and let stand at room temp. 30 minutes, then bake at 350 degrees for 40 minutes.
5. Sprinkle with remaining cheddar and bake 5 minutes or until cheese melts.

Tuesday, August 19, 2014

Tri Tip Steak with Mr. Yoshida's Sauce

The other day we were in Costco and sampling their new foods.  We came across a lady in the meat aisle and she was sampling tri tip steaks.  She had marinated it with Mr. Yoshida's Original Gourmet sauce.  Oh my goodness!  This was steak heaven on a toothpick.  My whole family went CRAZY over this!  I mean the "mom you have to get this!" kind of crazy!

So I asked the lady how she prepared it and got the ingredients while I was there.  The next night we had Tri tip steak with Mr. Yoshida's Sauce and veggie kababs.  I served them over rice.

The sauce is a sweet and tangy sauce, similar to an Asian stir-fry sauce.  It is delicious with steak and veggies.  So delicious that the next day I cut up the left over steak and veggies into smaller pieces, made some more rice, and stir fried the steak and veggies.  Super yummy.

To cook the tri tip I cut it into a little larger than bite-sized pieces and marinated them for about 30 minutes in the sauce.  I cut the veggies into chunks and then put the veggies and meat on skewers.  I grilled them for about 8 minutes total, until the meat seemed done enough for us (medium).  I let the kababs rest for about 3-4 minutes before serving.

You can also cook tri tip steak on the grill in large long lengths.  Cut against the grain to make a more tender slice.

I know you can get Mr. Yoshida's Original Gourmet sauce at Costco.  I looked at Kroger when I was there but didn't see it.

Tuesday, June 24, 2014

Easy Chicken with Onions and Mushrooms

Last night I had mushrooms that I needed to use and we are overrun with onions from a botched attempt and having a produce stand last week.  (Don't even ask, it isn't worth the tell).  AND I had some chicken.  So what do you do with those three items.

Chicken with Onions and Mushrooms of course!

I didn't have a recipe but went on what I knew and came up with a pretty good dinner that everyone enjoyed.

First I cut the chicken breasts in half long ways to make chicken cutlets.  I had three chicken breasts to I ended up with 6 cutlets.

Next in a large non-stick pan I put about two TBS of veggie oil in the pan and heated it up on medium high heat.  I added a whole Vidalia onion, sliced into the pan and sauteed.  When they were about half way done I added the sliced mushrooms, about 2 cups. Maybe more. I put a top on them to begin to cook them down. When things began to get nice and caramelized I added about  1/2 a can of chicken stock to the pan.  At that point I turned off the heat for a few minutes.  I wasn't ready to finish the sauce yet.

In a cast iron pan I heated the pan and about 2 TBS of veggie oil and cooked the chicken about 4-5 minutes on each side until the cutlets were done and had a nice brown color on them.  I then took them out of the pan and let the sit for a minute on a plate.

Back to the sauce.  I heated the onions and mushrooms back up with the chicken broth.  I stirred together 1 1/2 TBS of cornstarch with about 1/4 cup of broth and stirred it up until it was nicely blended and had no lumps.  Then I added this to the pan with the onions and mushrooms.  I stirred letting it thicken a bit.  For me it was a bit thick and I added a bit more chicken broth to the pan until it was a bit thinner but not watery.  At this point I also added about 1/4 tsp of ground black pepper and about 1/2 tsp of salt.

I put the chicken in a serving dish and poured the onions and mushroom sauce on top and served it over penne pasta.  Next time I will put the penne on the bottom of the serving dish, then the chicken and then the onions and mushrooms sauce.  It was really yummy and the kids even ate it well.

Recipe:

Chicken with Onions and Mushrooms

6 chicken cutlets
3 TBS vegetable oil, divided
1 can chicken stock or broth (about two cups), divided
1 large onion sliced
2 cups mushrooms, sliced
1/4 tsp ground black pepper
1/2 tsp salt
2 TBS cornstarch
1 lb Penne pasta, cooked
1/2 tsp fresh parsley, chopped

In a cast iron pan (or non-stick)over med-high heat 2 TBS of vegetable oil and cook chicken cutlets about 5 minutes on each side until done.  Set aside on a plate.  In same pan (or different pan if you choose) add additional TBS of oil and saute the onions until about half way done, then add the mushrooms and continue until all are caramelized (about 15 to 20 minutes).  They will be a medium brown color. Add 1/2 the can of chicken broth and bring to a boil, reduce the heat to simmer.  In a dish add 2 TBS of cornstarch to about 1/4 cup of chicken broth and stir until smooth and no lumps.  Add this mixture to the onions and mushrooms pan and stir until all is medium brown and thick like sauce.  Adjust the sauce thickness with the remaining chicken broth until desired consistency. (not too runny) Sprinkle ground black pepper and salt to taste.

In a serving dish cover the bottom with cooked Penne pasta, then add the chicken and pour the onions and mushrooms sauce over the entire dish.  Sprinkle with fresh parsley for color.

For a fun variation add a cup of thawed frozen peas at the end. Heat until hot in the sauce and serve as above.  The peas will add some much needed color.

Additional side dishes can include fresh bread and garden salad or fresh green beans or peas on the side.

Tuesday, June 17, 2014

Stuffed Peppers - Red Pepper Style

I am not a pepper person.  I just want to make that clear.  We had ground beef and red peppers in the house and it is just my husband and I so I thought I would try something different for dinner tonight.

I thought I would share my recipe.  I scanned the internet and took some basic ideas from the several recipes I saw and then ad libbed the rest.

Stuffed Red Peppers

1 lb ground beef
1 cup cooked rice (brown or white)
1 cup diced onion
1/2 cup diced red pepper
6 oz crushed tomatoes
2 tbs bread crumbs
1/2 tsp ground black pepper
1 tsp salt (or less to taste)
4 red peppers

Preheat oven to 350 degrees.
Cook the rice.
Cut peppers about a third of the way down the pepper.  Scoop out any white veins and rinse out any seeds. Dice up the tops of the peppers for the meat stuffing.
In a skillet brown the ground beef, onions and diced red peppers.
In a large pot boil some water to par boil the pepper bottoms. Just a few minutes until they are just soft. Take them out of the water and set aside to cool slightly.
Once the meat, onions and peppers are cooked drain off any extra fluid then add rice, tomatoes, black pepper and salt.
Stuff the pepper bottoms with the meat stuffing and set in an oven safe dish.  Pour water in the bottom of the dish until it is about 1/8 inch from the bottom. Top the peppers with bread crumbs and bake for 25-30 minutes.
Let cool slightly before serving.

Yum!

Monday, June 16, 2014

Awesome Stuffed Peppers

I am not a pepper person.  I just want to make that clear.  We had ground beef and red peppers in the house and it is just my husband and I so I thought I would try something different for dinner tonight.

I thought I would share my recipe.  I scanned the internet and took some basic ideas from the several recipes I saw and then ad libbed the rest.

Stuffed Red Peppers

1 lb ground beef
1 cup cooked rice (brown or white)
1 cup diced onion
1/2 cup diced red pepper
6 oz crushed tomatoes
2 tbs bread crumbs
1/2 tsp ground black pepper
1 tsp salt (or less to taste)
4 red peppers

Preheat oven to 350 degrees.
Cook the rice.
Cut peppers about a third of the way down the pepper.  Scoop out any white veins and rinse out any seeds. Dice up the tops of the peppers for the meat stuffing.
In a skillet brown the ground beef, onions and diced red peppers.
In a large pot boil some water to par boil the pepper bottoms. Just a few minutes until they are just soft. Take them out of the water and set aside to cool slightly.
Once the meat, onions and peppers are cooked drain off any extra fluid then add rice, tomatoes, black pepper and salt.
Stuff the pepper bottoms with the meat stuffing and set in an oven safe dish.  Pour water in the bottom of the dish until it is about 1/8 inch from the bottom. Top the peppers with bread crumbs and bake for 25-30 minutes.
Let cool slightly before serving.

Yum!

Wednesday, February 27, 2013

More Bread Making-A Comparison of Two Recipes

I found this recipe yesterday and it was recommended to me by a friend.  I thought I would try it.  I tweaked it just a bit.  This is the recipe I used (with the tweaking):


Amish White Bread

2 cups warm water
1 1/2 TBS Active Dry Yeast
1/4 cup of sugar (the original recipe calls for 2/3 cup sugar)
1/4 cup vegetable oil (I used canola)
1/2 tsp salt
6 cups all purpose flour

Mix the sugar and water together and then mix the yeast in.  Let sit for about 10 minutes until frothy to activate the yeast.  Then mix in the salt and oil into the yeast mixture.  Then add the flour.  Turn out onto a clean, floured surface and knead a few times until the dough is smooth.  Then put in an oiled bowl and let rise for about 2 hours or until double the size.  Turn out onto a floured surface again and knead a few more times.  Divide in half and place into two loaf pans.  Cover and let rise for another 30 minutes.  Bake at 350 for about 35 minutes or until golden brown.

My recipe:

2  to 2 1/2 cups warm water
1 1/2 TBS active dry yeast
1 1/2 TBS salt ( I play with this amount and often only use 1 TBS)
6 1/2 cups flour

Basically I put it together and knead and let rise the same way and times as above.  The difference is that I bake it at 400 for 30 minutes or so.


The verdict.

The Amish bread was a smoother dough.  I tend to not knead much on mine and perhaps if I did it might make a difference.  Rise times were the same.  The Amish bread smelled delicious while baking and the loaves came out a pretty golden brown.
(My recipe on left, Amish recipe on right)


When slicing into the Amish bread the crust wasn't as crusty as my recipe so the Amish bread was a bit easier to slice.

(My recipe on left, Amish recipe on right)

The Amish bread looked and felt more spongy. It seemed very similar to store bought loaf.

(I cut my recipe bread a bit thin which caused it to crack down the center, the Amish recipe was sliced a bit thicker)


Upon tasting the Amish bread had a soft texture, a good slightly sweet flavor and was great for my peanut butter and jelly sandwich. My recipe was slightly saltier and had a more rustic flavor.  The crust was crusty and the center was dense but not crumbly or dry.  My son and I prefer my recipe better than the Amish bread.  My husband prefers the Amish bread mainly because of the texture and similarity to store bought bread.

In the end, I am going to work on my recipe a bit more.  I am wondering if the oil will help with the sponginess.  Tomorrow I am going to use my recipe and add oil and reduce the water to 2 cups.  I will report my findings.

Wednesday, January 16, 2013

Homemade Laundry Detergent

Remember this???  I made some homemade laundry detergent and posted it here.  I have been very pleased with this recipe.  I knew we did a lot of laundry in our house but I expected it to last about 4 months rather than their "6 mo-1 year" estimate.  I used two scoops for each load and was very pleased with the results from the 2 scoops.  Therefore mine only lasted 2 months.

I am off to the store to get some more ingredients to make it again.  I am going to cost average it out today to see how inexpensive each load is.

UPDATE***

I priced it all out and it cost me about $10 for the batch.  Each batch lasted me two months and that comes to $5 a month.  I am not going to price it down further because honestly I don't know how to go from lbs and oz to TBS.  That just seems too hard and I have better things to do with my life that scoop out each TBS from the big jar and count. LOL

I think $5 a month for the amount of laundry I do is quite cheap!  I am sticking with this.

Have a great day!

Wednesday, November 21, 2012

Healthy Lunches Recipes

Check out this awesome book for free for Kindle today.  You can get the Kindle app on ipad, tablets, phones, and more.  You can get the app for free and this book for free.  Oh you can also get this app for your PC too.


Go here to get the app.  http://www.amazon.com/s/ref=nb_sb_noss_1?url=search-alias%3Daps&field-keywords=kindle+app


Have a great day!

Thursday, November 8, 2012

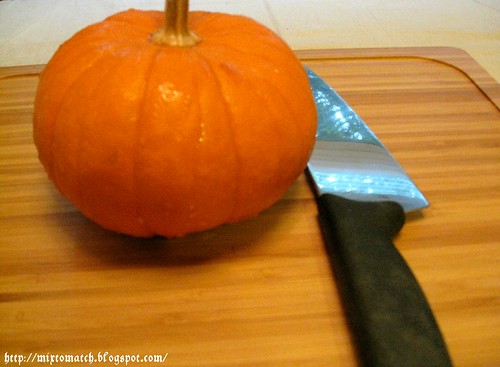
Pumpkin

photo from http://mixtomatch.blogspot.com
Did you know you can use a real pumpkin to make pumpkin bread, pumpkin pie, pumpkin cookies?  Yes, I did too but I never knew exactly how you use it.  I have always used the canned stuff to make my baked pumpkin goods.  I never knew how to get it from fresh form to what I get from a can.

It actually couldn't be simpler.  I asked a friend and she told me.  I am posting this for others who never knew too.

Take the pumpkin (I have small ones, I don't know if the large jack-o-lantern size would work or not) wash the dirt off the outside and cut it in half, top to bottom.  Scoop out all the seeds and stringy stuff.  Then place them cut side down on a cookie sheet.  Pour some water on the cookie sheet so the pumpkins don't dry out while cooking.  Place in the oven at 350 degrees for about an hour until you can stick your knife easily in and out of the pumpkin flesh.  Let cool and scoop out the insides.  Then just use that as you would regular canned pumpkin.  See.  Easy Peasy!

I have done four pumpkins and have a TON of pumpkin flesh for breads and pies later.  I put mine in Ziploc bags and stuck it in the freezer for later.

I did make some yummy pumpkin bread using this recipe here.

http://blog.streaminggourmet.com/2009/10/23/ultimate-pumpkin-bread/


Friday, October 26, 2012

Easy Homefries (Hashbrowns) - two recipes

My family loves hashbrowns.  For years I could never make them well.  They tended to either stick badly to the bottom of the pan or burn and not cook through, or well, just not turn out looking like the ones you get in restaurants.

Over the years we have found two awesome methods for making hashbrowns.

Tater Tot Hashbrowns:

1 bag of frozen tater tots
1 onion chopped
3 tbsp vegetable oil

In a large pan or skillet heat the oil over medium/medium high  heat and add the onions and tater tots (I like to heat them up in the microwave for a few minutes until they thaw to reduce the cooking time).  Cover and let thaw for about 5 minutes.  Then using your pancake turner or a large spoon chop or crush the tater tots and mix around until the onions are cooked and the tater tots are smashed into small pieces.  Season with salt and pepper on your plate.


This second one is a great way to use left over potatoes or even french fries.  (Yes we bring left over french fries home from restaurants when we have a bunch left over.)

Leftover Potato Hashbrowns:

Chop potatoes or french fries into cubes.  Heat skillet to medium high and add a few tablespoons of vegetable oil. Add potatoes and chopped onion. Fry until warm and beginning to brown.  Season with salt and pepper if desired.  This works best with thicker cut fries not the skinny ones.

If you don't have any left over potatoes or french fries you can cube a potato and heat it in the microwave until just done and then fry in a skillet.

I use my cast iron skillets to cook these.  I love the cast iron because it holds the heat well and disperses it evenly.

Friday, October 19, 2012

Grow an Avocado Plant

(Getty Images, pulled from iVilliage.com)
We love guacamole and I am going to be making it tonight as part of our dinner.  I will take the stone and plant it immediately and I will let you know how it grows.  It will be an indoor plant this winter and I will take it outside for the summer time. I love to slice avocado and put on my turkey sandwiches, salads and just eat plain.  I only buy them when they are $1 each or less though because they are so darn expensive.  With a tree we can have our own for free.  Yes it will take 3 years to get to maturity but it will be so worth the wait.  Yum!


Copied from avacado.org

Avocado Nutrition Information

Avocados provide nearly 20 essential nutrients, including fiber, potassium, Vitamin E, B-vitamins and folic acid. They also act as a "nutrient booster" by enabling the body to absorb more fat-soluble nutrients, such as alpha and beta-carotene and lutein, in foods that are eaten with the fruit. You can find detailed avocado nutrition information listed in our Avocado Nutrients section including all of the vitamins and minerals found in avocado.

Avocados and Cardiovascular Disease

Cardiovascular disease is the leading cause of death in the United States, but a healthy diet and exercise plan may help reduce your risk of developing the life-threatening illness.
The American Heart Association (AHA) Dietary Guidelines recommend a diet that has at least five servings of fruits and vegetables, contains up to 30% of calories from fats (primarily unsaturated) and is low in saturated fat, cholesterol, trans fats and sodium while being rich in potassium. Avocados can help you meet the AHA dietary guidelines because they have both monosaturated and polyunsaturated fat and contain potassium.


Have a great day!


Weekly Menu Planning (and Freebie)

With all the changes that has happened in our household the past month one thing that we have had to be extra careful of is our money.  We don't have a lot of it right now and we have been going through some transitions with that.

One thing that we haven't been doing much is going out to eat.  The kids have felt the brunt of this.  In the past we have gone out to eat at least once a week if not more often.  Now we eat every meal at home.  We have to plan when we go out that we won't be out during a meal time where we will be tempted to eat out.  This also means that we must plan our meals more carefully so that I have all the ingredients I need to cook supper.  I also have to be ever present to make sure that I take out anything that needs thawing in the morning so it is ready to cook in the afternoon.

This afternoon I decided to whip up a form that I can fill out for a weekly meal plan.  I have covered this subject before but tonight I thought I would share my form with you all.  It is yours for free to print as many as you want.  What I love about this form is that it has room to write your menu items for all three meals a day and you have a column for your shopping list.  You can create your menu and add any items you need to your shopping list immediately.  When you are done you can simply cut or tear off the shopping list and head off to the store.

I have two links for you.  The first is the Weekly Menu Plan with all three meals and the shopping list.  The second is the Weekly Menu Plan with a "snack" line for each day.  I also plan a snack.  It just makes it easy for us to know what is available to eat for snacks.  If you are like me, then there are teenagers in the house who seem to be ravenous all day long!


Weekly Menu Plan

Weekly Menu Plan w/ Snack

These files are in .ODT form, this is an Open Office file.  I don't have MS Word on my computer but you can convert these over to a Word doc pretty easily I think.  Let me know if you have any problems with the files.

Enjoy and I hope that you will get good use out of them.  I pray that they save you money, time and effort in your busy days.

Wednesday, April 25, 2012

Menu Planning Saves Money

Taking a few minutes each week to plan a menu for the week will help you save money.  It does for me.   If I don't plan a menu I will tend to run out and grab take out for dinner, throw the kids in the car and eat out, or run to the grocery store and grab fresh meat (not frozen in my freezer at 5 pm) and other items that I may already have in my pantry for dinner, thus costing me more money than necessary.

We try to keep a budget in our house but usually our budget goes like this: spend until there is no more money in the checking account.  This can make my body panic when we get close to the end of the month or a payday when we have no more money but several more days before we get paid.

In order to keep this panicked feeling from arising I menu plan.  It is simple and if done consistently can really save you money.

The Method:

A pen and paper is needed so grab that first.

Make a quick chart with days of the week and the meals you will need to fix for your family.  It can be as simple as just planning for dinners, or as complex as planning for breakfast, lunch, dinner, and an afternoon snack or evening dessert (or both).

Fill in your chart with the meals you plan to fix.

Mine for this week looked similar to this:

Monday:
B:  Cereal, fruit
L:  PBJ Sandwiches, chips, grapes
D:  Spaghetti

Tuesday:
B:  Waffles
L:  Buy lunch at school
D:  Pizza, salad

Wednesday:
B: McDonalds Drive Thru
L:  Turkey Roll-ups, crackers, applesauce
D:  Hamburgers, fries, carrots and ranch dip

Thursday:
B: Eggs and Hashbrowns
L: Ham and salami sandwiches, chips, banana
D: Pork Chops, pasta, veggie, rolls

Friday:
B:  Cereal, fruit
L:  Buy lunch at school
D:  Tacos, salsa and chips, rice

This was pretty general for our family as we typically also include in the menu a dessert a couple times a week and an afternoon snack when the kids get home.

I usually make the menu just prior to completing my grocery shopping list for the week.  I scan the newspaper flyers for the local grocery store and create a menu using the foods on sale that week. I also include the kids in this process and ask them if they want to add any meals to the menu.  With them helping me create the menu, they feel involved in the process.  Then I add additional items from the menu to my shopping list so have all the ingredients to make the meals.  I also check my pantry to make sure there is no overlap and add any other items I am lacking or low on from my pantry to my list.

Benefits of Menu Planning:

1.  Kids are involved so they don't complain too much about what we are having for dinner.  If they don't particularly want what we are having tonight they know that the meal that they requested is coming the next day or later in the week so they don't tend to complain too much.

2.  I can save money by buying items that are on sale that week when I use the newspaper flyers when planning for the week.  I can also add coupons I have as well.

3.  The menu is posted so everyone know what we are eating for each meal.

4.  I am not as stressed about planning the meals during the week because it is already done.

5.  I am rarely without an ingredient for  our meal becuase I planned prior to making my shopping list and included everything I needed on the list.

6.  My pantry remains stocked and I rotate my food storage because I use it in my meal planning.

7.  I don't panic in the afternoon when my kids say, "I am hungry!" about what I will be fixing for dinner.  I know what I am fixing and thus no panic.

8.  We don't eat out at often because of lack of planning or preparation for meals.

Then entire process of meal planning takes us about 15 to 20 minutes a week.  The first time you do this you may find it can take up to an hour depending on how detailed you get.  Some people only plan their dinners as their breakfasts are usually the same every day.  Others like me, plan every meal.  You may want to begin with one meal (like dinners) for a week and see how it goes for you.

Once we complete our menu it is written on our blackboard that is in our kitchen.  We love this board because it is our "control center".  Not only do we have our menu but we also have the kids' activities and schedules written on it along with emergency phone numbers and other information we use often.  It is easy to glance on the board and see what is going on for each day.

Tuesday, February 7, 2012

Chicken Noodle Soup Warms My Soul

There is something soothing to the soul in chicken noodle soup.  I truly believe it has wonderful healing properties.  There is enough warm mild broth, enough protein, enough hardy vegetables, and enough carbohydrates to be healthy, filling and soul warming.  It is one meal that my kids and husband go back for seconds almost every time.

You can make this healthy comfort food from your food storage too.

Chicken Noodle Soup

Ingredients:
1 can mixed vegetables (drained)
1 tbs olive oil
1 can chicken
2 quarts of chicken broth (or chicken boulion with 2 quarts water)
1/3 lb linguini noodles (broken into 1 inch pieces)

Mix all together, cook to boiling, boil for 10-12 minutes or until noodles are cooked.

See how easy that is!  Now you can doctor it up and add some spices or other left over vegetables, maybe a potato.

This is how I make it fresh.

Ingredients:
3-4 stalks celery (diced)
1 onion (diced)
3-4 carrots (diced)
1 lb chicken, cooked, chopped (I use left over chicken usually)
1/3 lb linguini, broken into 1 inch pieces
2-3 quarts of chicken broth (either from cans or boullion)
1 TBS olive oil

In a large stock pot heat oil and add vegetables.  Stir and cook until partly soft.  Add chicken broth, chicken and bring to a boil.  Add noodles and boil for 10-12 minutes until noodles are done.  Serve with warm bread or crackers.

Sunday, February 5, 2012

The Verdict is in! ~~~ Maple Syrup~~~

I said I would test out the new maple syrup recipes I found recently.  Here and here.  I said I would test them out on my family and report back with the verdict.  Well, the verdict is in.

Given our druthers we would all rather have the store bought version.

The recipe with the brown sugar and vanilla (additional ingredients) has more depth of flavor than the recipe with just sugar, water, and maple flavoring.  So we did like the brown sugar and vanilla version better than the sugar and water one.

However, we used it warm, well hot and we think that it was a bit thin.  It needed to thicken up just a bit and are wondering if that would happen if we let it cool more.  We also tested it with our favorite syrup "Mrs. Butterworth" and while that is a bit buttery we didn't taste the butter flavoring as much as the vanilla in the store bought brand.  The vanilla was a bit stronger in the store bought version.

So in a pinch the kids said that we could make the homemade version and it would do.  But they would like for me to stock up on the store bought version so we don't have to go homemade.  ha ha.

I am going to work on it a bit more and play with the amounts some and see if I can get it thicker a bit.  It is worth a try on your family and it is so much cheaper than the store bought version.